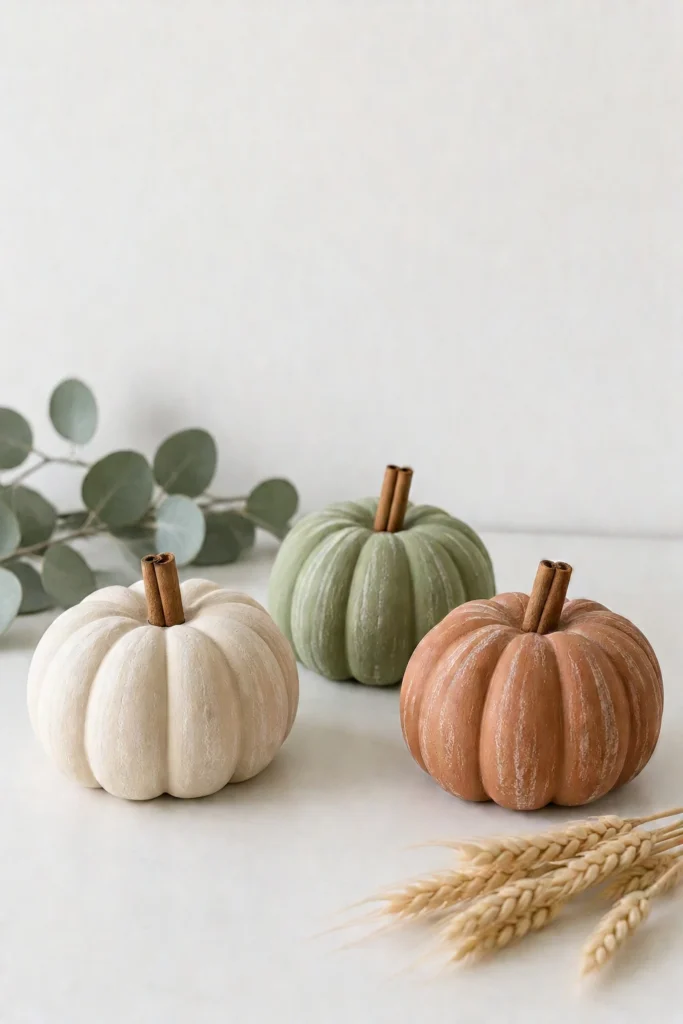
Make the cutest little fall pumpkins from air dry clay in 5 easy steps! No kiln, no oven, and a cinnamon stick for the stem!
I love a fall craft that’s cheap, quick, and doesn’t need any fancy tools. These little air dry clay pumpkins check every box! All you need is a block of clay, a butter knife, some craft paint and a few cinnamon sticks from the spice cupboard.
Those little ceramic pumpkins at home decor stores are adorable, but a whole cluster adds up fast! Making them yourself costs a fraction of the price, and you get to choose the exact colors to match your home.
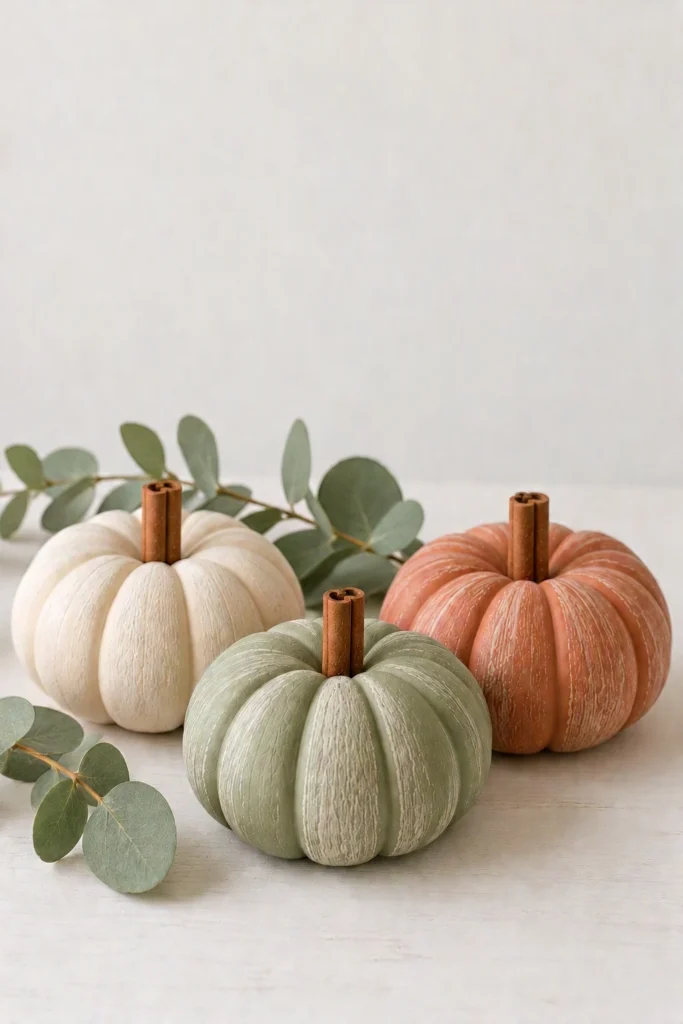
They’re about 3 inches wide, a little bit imperfect in the best way, and you can paint them any color to match your fall decor. I went with cream, sage green and terracotta (and I’m a little obsessed). Keep reading for the step-by-step tutorial, plus my favorite trick for that soft, weathered finish!
What you need to make air dry clay pumpkins
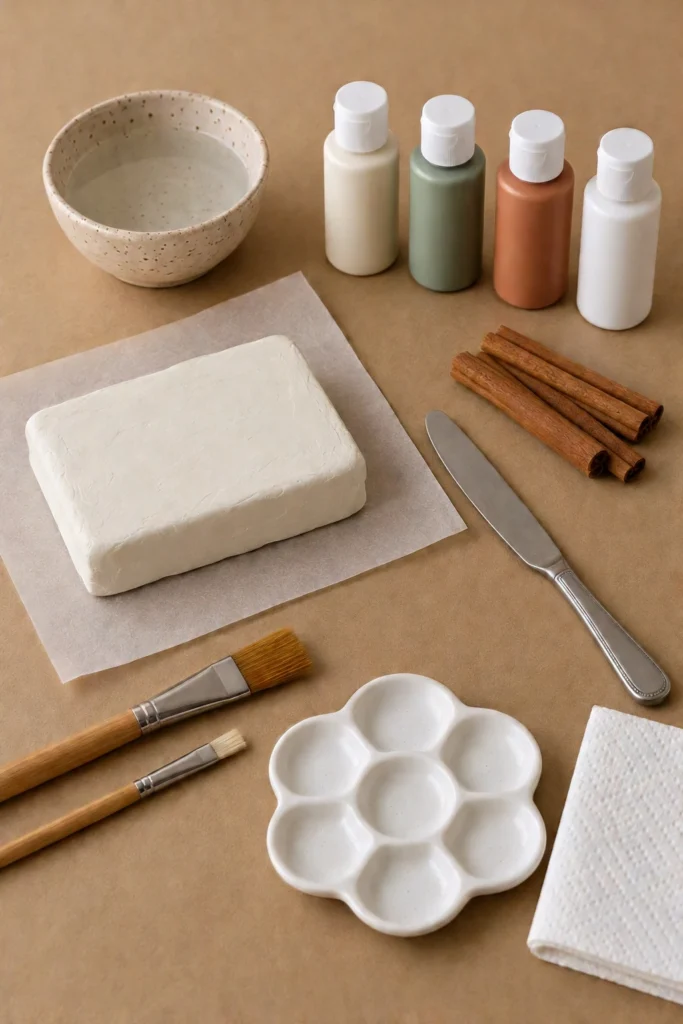
- white air dry clay: a 2 lb block makes about 6 to 8 small pumpkins. Any brand from the craft store works. Crayola and DAS both make a great white air dry clay, and you can find them at Michaels, Hobby Lobby, Walmart or on Amazon.
- a small bowl of water: for smoothing cracks and fingerprints
- a butter knife: the back (dull) edge makes perfect pumpkin ribs, no clay tools needed!
- cinnamon sticks: break them into pieces about 1.5 inches long. They make the cutest stems (and they smell amazing).
- acrylic craft paint: I used cream, sage green, terracotta and white. Matte paint gives the softest look.
- a medium flat paint brush for the base coat
- a small, stiff flat brush for dry brushing (an old, scruffy one is perfect for this)
- a paint palette: or a paper plate
- paper towels: for blotting your brush when dry brushing
- matte spray or brush-on sealer: optional, but it protects the paint from chips
- parchment paper or kraft paper: to keep clay off your table
How long does air dry clay take to dry?
Small pumpkins like these take about 24 to 48 hours to dry completely. They’ll feel lighter, look chalky white all over, and won’t feel cool to the touch when they’re ready. Flip them halfway through so the bottoms dry too. Thicker or bigger pumpkins can take up to 72 hours, so be patient (I know, it’s the hardest part!).
Why does air dry clay crack?
Air dry clay cracks when it dries out too fast or when the clay is too thick. A few things help:
- Smooth the surface with a damp (not dripping!) finger before it dries.
- Dry your pumpkins away from heaters, fans and direct sun.
- If a small crack shows up, just fill it with a dab of wet clay and smooth it over. Once it’s painted, no one will ever know.
So don’t stress if you spot a crack or two. It happens to everyone, and a little wet clay fixes it in seconds!
Can you paint air dry clay with acrylic paint?
Yes! Regular acrylic craft paint works great on air dry clay, and it’s the cheapest option. Just make sure the clay is completely dry first, or the paint can crack and peel. A matte sealer on top is optional but helps if your pumpkins will be handled a lot (hello, little hands).
How to make air dry clay pumpkins
Step 1: Shape the clay
Pull off a chunk of clay about the size of a small orange. Knead it in your hands for a minute to warm it up, then roll it into a smooth ball between your palms.
Set the ball down and gently press on the top so it’s a little wider than it is tall. Pumpkins are squat, not round! Then press your thumb into the center of the top to make a shallow dimple for the stem.
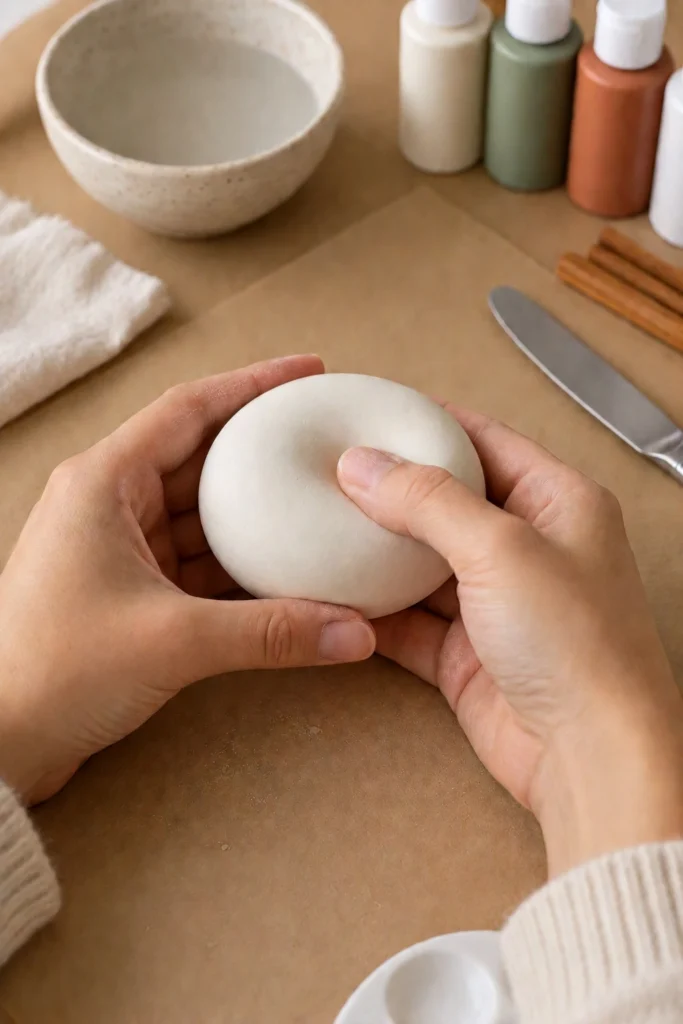
If you see little cracks or fingerprints, dip a finger in water and smooth them out. Don’t overdo the water, though, or the clay gets slimy.
Step 2: Press in the ribs
This is the fun part! Take the back (dull side) of a butter knife and press it into the side of the clay, starting at the top dimple and going straight down to the bottom. Turn the pumpkin and make the next groove directly across from the first one.
Keep going, filling in between your grooves until you have about 10 ribs all the way around. Doing opposite sides first helps keep the spacing even-ish.
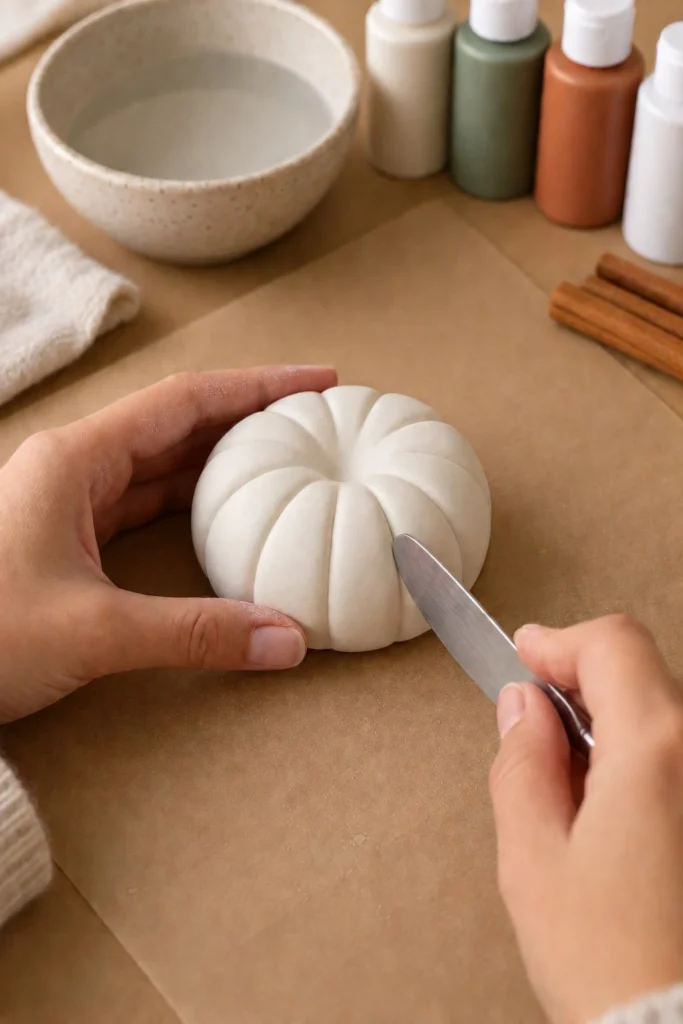
It’s not going to be perfect and that’s okay! Uneven ribs actually make them look more like real pumpkins.
Step 3: Add a cinnamon stick stem
Break a cinnamon stick into a piece about 1.5 inches long. Push it straight down into the dimple on top while the clay is still soft. The clay will grip it as it dries.
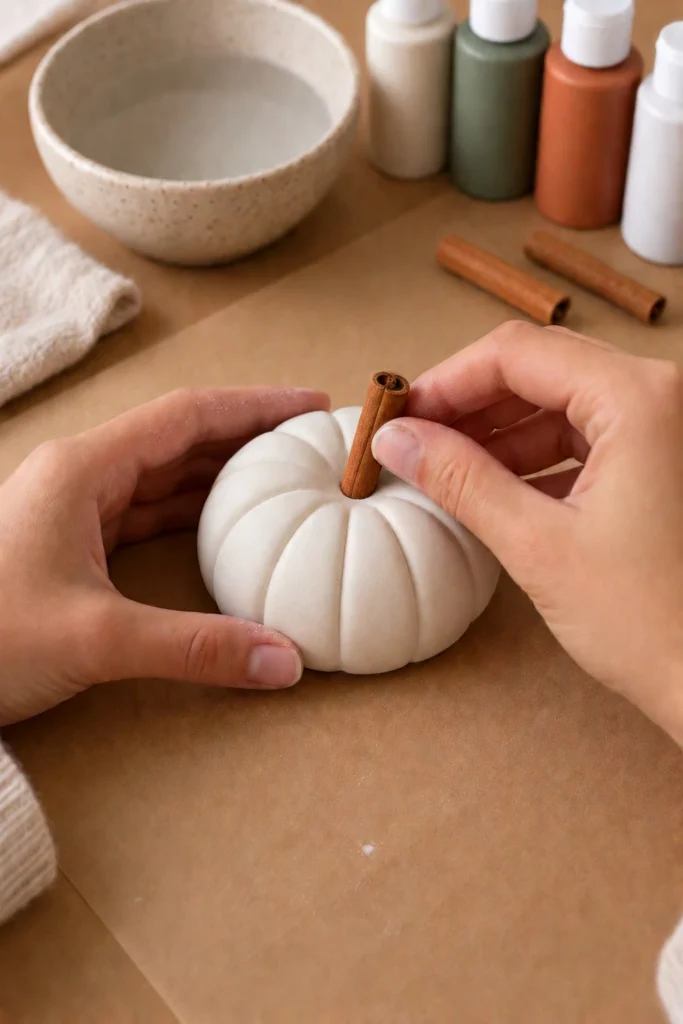
If your stem ever feels loose once everything is dry, add a tiny dab of hot glue or craft glue and push it back in.
Step 4: Let them dry
Set your pumpkins on parchment paper somewhere out of the way and let them dry for 24 to 48 hours. Flip them over halfway through so the bottoms dry evenly.
Honestly, this is the hardest step because you’ll want to paint them right away! Tip: make them on a Thursday or Friday evening, and they’ll be ready to paint by the weekend.
Step 5: Paint and dry brush
Once your pumpkins are completely dry, paint them with your base color. Hold the pumpkin by its cinnamon stick stem so your fingers stay clean (mostly). Use a medium flat brush and paint up and down along the ribs. Two coats gives the best coverage; let the first coat dry before adding the second.
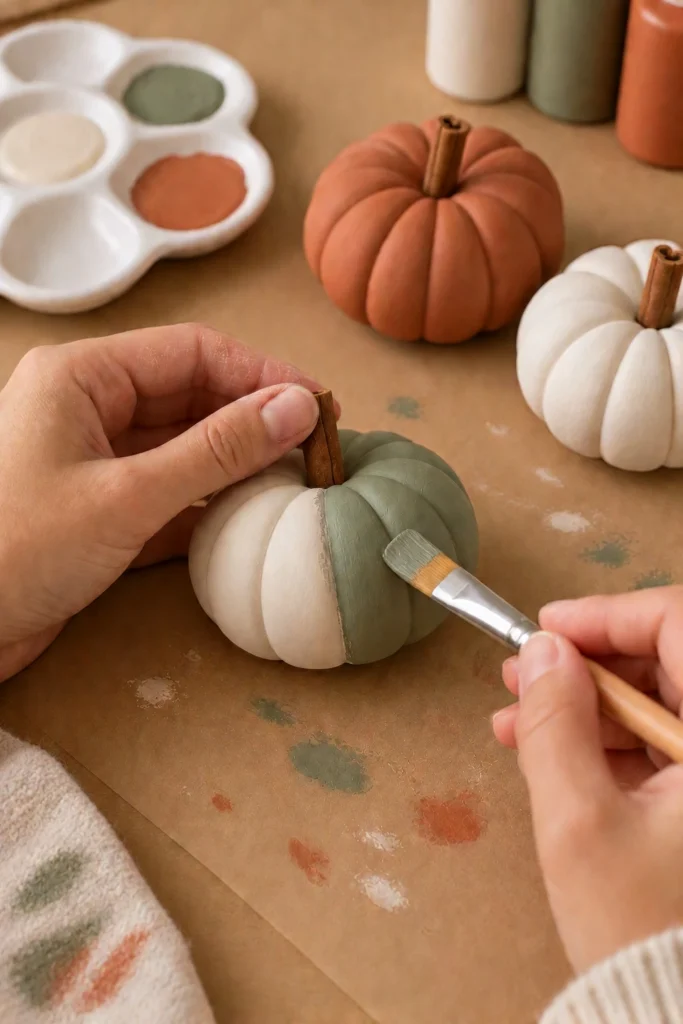
Now for the magic step: dry brushing! Dip just the tips of a small, stiff brush in white paint, then wipe most of it off on a paper towel until the brush is almost dry. Lightly drag it across the ribs. The white catches on the raised parts and gives the pumpkins that soft, weathered farmhouse look.
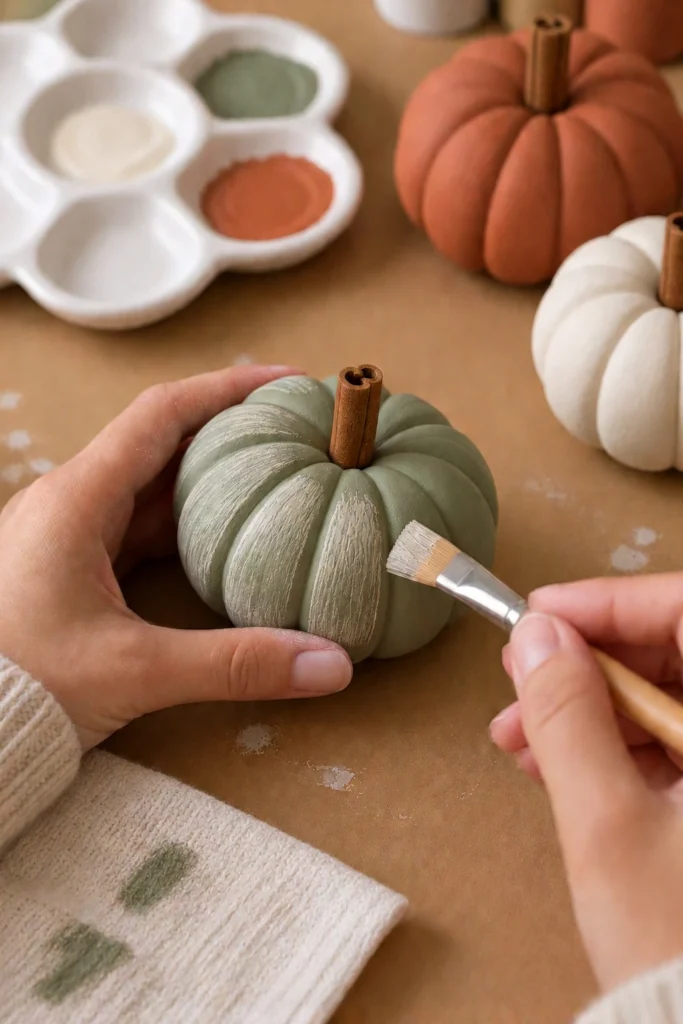
Start light. You can always add more white, but it’s hard to take it away! If you go too far, just paint a little base color back over that spot.
Once the paint is dry, add a coat of matte sealer if you want extra protection.
And you’re done! Look how cute these little guys turned out:
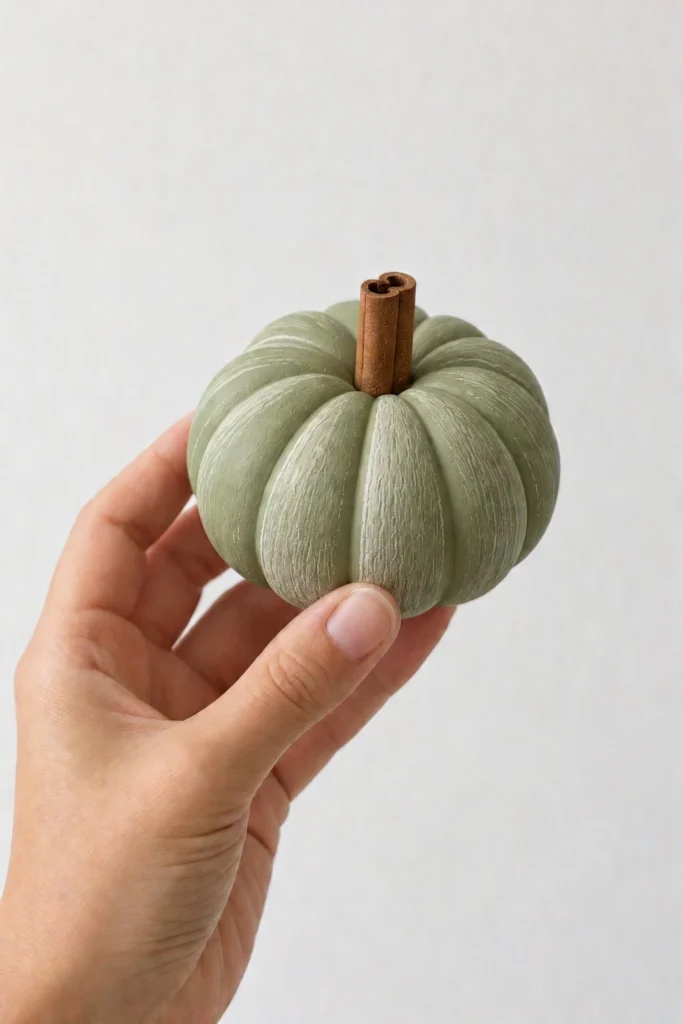
They’re the perfect size for tucking into all your fall decor. Here are a few ways to use them:
- on a tiered tray with dried wheat and eucalyptus
- lined up along a mantel or bookshelf
- as Thanksgiving place card holders (tuck a name card behind the stem)
- in a dough bowl centerpiece on your kitchen table
- as a little handmade gift for a neighbor or teacher
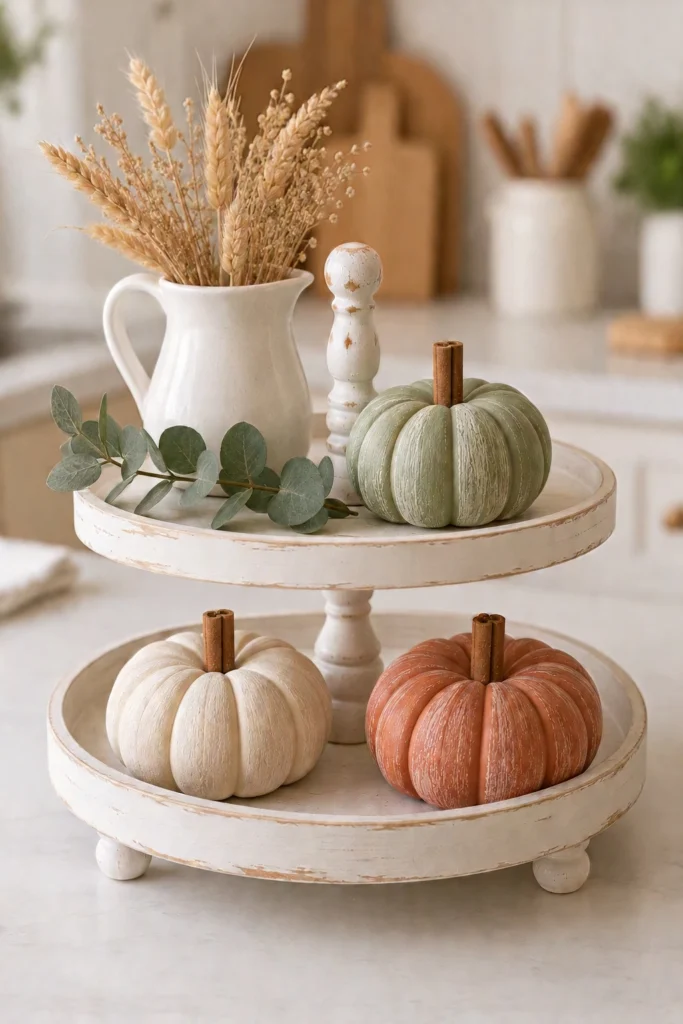
DIY Air Dry Clay Pumpkins
I hope you love making these easy air dry clay pumpkins as much as I did! They’re cheap, they’re cozy, and once you make one, you’ll want a whole pumpkin patch. Try making a few in different sizes for a little pumpkin patch on your mantel!
Happy crafting!
Don’t forget to pin and save for later!